前言
记录重建博客的过程 工具/环境: PC: mac Code: org-mode,关于org-mode的强大功能可参考Org-mode: Organize your life in plain text! Tool: Spacemacs
搭建博客方案>
静态网站搭建博客适合专注于内容的博客网站,常见的静态搭建博客网站的方案见:11个最流行的静态网站生成工具。 Octopress/Jekyll对org-mode支持较好,且资源较多,所以采用该解决方案。 博客平台基于Github Pages,优势是:
- 能够基于本地编写文章
- 追求简洁,轻便
Jekyll介绍
参考自:jekyll-emacs jekyll-官方-doc 功能完整的Jekyll博客目录包含以下结构和文件:
1
2
3
4
5
6
7
8
9
10
11
12
13
14
15
16
17
18
19
20
21
22
23
24
25
26
-- index.html # 网站首页文件
-- archives.html # 文章存档页面文件,文件名可改
-- categories.html # 文章分类页面文件,文件名可改
-- tags.html # 文章标签页面文件,文件名可改
-- about.html # “关于我”页面文件,文件名可
-- rss.xml或atom.xml # 博客地图,SEO优化
-- _config.yml # Jekyll博客配置文件
-- _layouts # 博客模板目录
   -- default.html
   -- post.html
-- _includes # 可复用的公用模板文件目录,例如博客的导航条,不是必须的,
             # 但分离出各个页面的共有部分可以使得模板更易读,结构更清晰
   -- footer.html
   -- footer.html
   -- <other file to include in template>
-- _posts # 文件存放目录
   -- 2013-09-08-test.html
   -- <other posts>
-- assets/ # 其他博客文件存放目录,如css,图片,js文件,以下目录结构为示例
   -- css
      -- style.css
   -- img
      -- favicon.ico
   -- js
      -- blog.js
-- _doc # yaml/json/csv/tsv文件,可定义通用的数据:valuable/options
较为核心的文件说明:
_config.yaml
_config.yaml文件为Jekyll博客的配置文件,用户可以在该文件中设置博客名称/博客描述/作者名称等信息,并可以 在模板中作为变量使用 。基于模板进行博客配置的话,主要修改该文件即可:1 2 3 4 5 6 7 8 9 10 11 12 13 14 15 16 17 18 19 20 21 22 23 24 25 26 27 28 29 30 31 32 33 34 35 36 37 38 39 40 41 42 43 44 45 46 47 48 49
# Handing Reading encoding: utf-8 # Basic title: main_title subtitle: sub_title description: description permalink: /:year/:month/:title/ # Format highlighter: rouge # supported colors: blue, green, purple, red, orange or slate. If you need clear, leave it empty. cover_color: # The blog button should not be removed. blog_button: title: Blog description: Visit blog # Navigation buttons in the front page. nav: # - {title: Another Button, description: A button, url: 'http://example.com'} # Pagination plugins: [jekyll-paginate] paginate: 10 paginate_path: "page/:num/" # Comment comment: # disqus: **** # duoshuo: # Default: 对应目录下的默认页面配置信息 default: # Social social: weibo: **** github: **** twitter: **** mail: **** # Google Analytics ga: # id: your_ga_id # host: your_host
博客部署
本文基于Jekyll模板:jekyll-theme-chirpy 安装步骤如下:
1
2
3
4
5
6
7
8
9
10
11
12
13
# clone, 命名为username.github.io,方便GitHub Pages部署
git clone git@github.com:cotes2020/jekyll-theme-chirpy.git username.github.io
# 安装gem依赖
bundle
# 初始化
bash tools/init.sh
# 删除现有文件
rm -rf .travis.yaml _posts/* docs
# 修改_config.yaml,主要修改:url/avatar/timezone/lang/social等内容
# 具体可参考个人博客:https://github.com/ZhengWG/ZhengWG.github.io
# 添加博客文件(markdonw/html格式)到_posts
# 本地预览
bundle exec jekyll s
远程部署到Github Pages,因为其采用safe mode,导致无法应用额外的插件。这里采用Github Actions来部署,主要基于./github/workflows/pages-deploy.yaml文件(默认是ignore的,需要修改.gitignore文件)。push到远程仓库后,Github会进行build,然后生成gh-pages分支。 最后修改Github Pages对应的配置: Settings->Options->Github Pages ,修改publishing source:master->gh-pages。
博客评论
基于Jekyll的评论方案,简单介绍如下:
- Disqus:一般Jekyll模板都默认支持,但是缺点是需要翻墙
- 网易云评论:需要自己的域名
- Duoshuo:停止服务
- gitment/gittalk:通过Github issue的方式,但是貌似有权限过高的风险
- Valine:基于LeanCloud的评论系统,比较方便:官网。
下面介绍基于Disqus和Valine的评论配置系统,自己最后还是采用了Valine的方案(毕竟不用翻墙):
Disqus评论: jekyll-theme-chirpy默认支持Disqus评论,配置方式如下: 注册登陆:Disqus,提供了社会化的评论系统。按照指引操作(中间跳过付费plan)注册登陆最后会得到shortname。 修改
_config.yaml文件:1 2 3
disqus: comments: true shortname: 'shortname'
最后评论的效果:

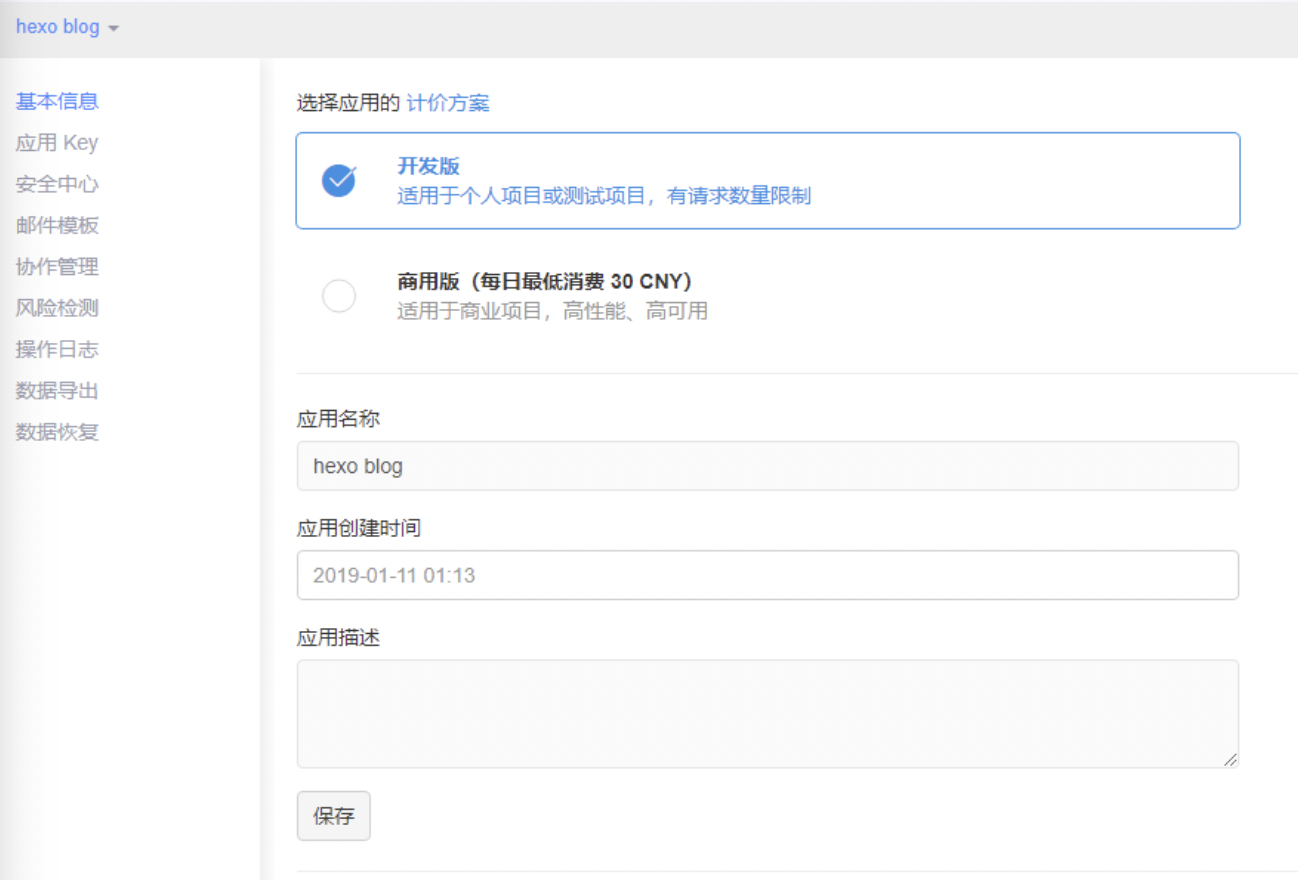
Valine评论: 搭建Valine评论系统,需要先在LeanCloud官网创建应用,注册后,创建应用并命名:

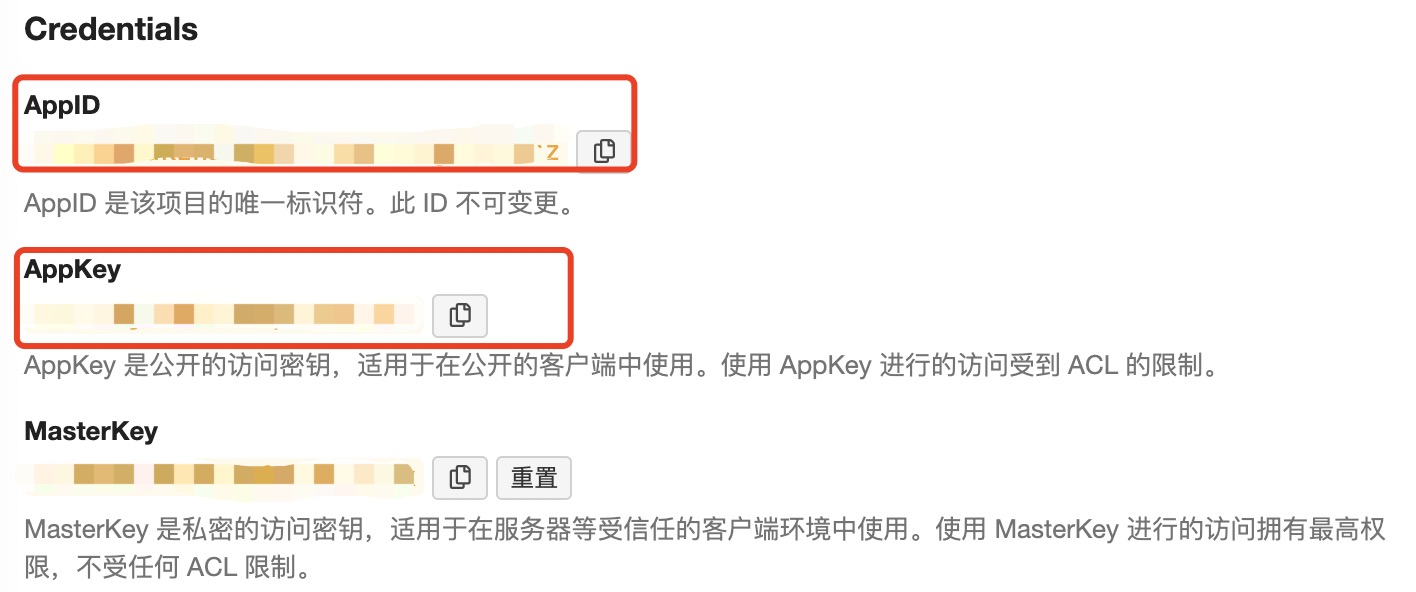
然后获取该应用的相关验证信息:应用->设置->应用凭证:

同时设置Web安全域名:应用->设置->安全中心:

创建应用后,需要在自己的本地博客工程内,添加Valine的支持,首先在
_config.yaml文件中创建变量:1 2 3 4 5 6 7 8
valine_comment: enable: true # app_id leancloud_appid: ***************** # app_key leancloud_appkey: ***************** # placeholder placeholder: "请在下面评论:"
然后创建
valine.html,默认位于_includes文件夹下(注意需要去掉\{\%}前的\转义符):1 2 3 4 5 6 7 8 9 10 11 12 13 14
\{\% if site.valine_comment.enable %} <div id="comments"></div> <script src="//cdn1.lncld.net/static/js/3.0.4/av-min.js"></script> <script src='//unpkg.com/valine/dist/Valine.min.js'></script> <script> new Valine({ el: '#comments', app_id: 'IJm2s0GdkzhEOLwVfClrHeWs-gzGzoHsz', app_key: 'Y281bajarkkIGs8p4WmrTkNi', placeholder: '请在下面评论:', visitor: true }); </script> \{\% endif %}
最后,需要在需要加载
valine.html文件的地方添加应用,如_layouts文件夹下的page.html和post.html:page.html(注意需要去掉\{\%}前的\转义符):1 2 3 4 5 6 7 8 9 10 11
\{\% if site.valine_comment.enable and page.comments %} <div class="row"> <div class="col-12 col-lg-11 col-xl-8"> <div class="pl-1 pr-1 pl-sm-2 pr-sm-2 pl-md-4 pr-md-4"> \{\% include valine.html %} </div> <!-- .pl-1 pr-1 --> </div> <!-- .col-12 --> </div> <!-- .row --> \{\% endif %}
post.html(注意需要去掉\{\%}前的\转义符):1 2 3
\{\% if site.valine_comment.enable and page.comments %} \{\% include valine.html %} \{\% endif %}
最后,可得到评论效果:

Google Analytics
基于Google Analytics可以对站点进行监控。到GA官网(需要科学上网)登陆,创建账号/媒体资源,注意新版本需要在高级选项中选择UA相关功能:

最后得到 track-id(UA-\*\*\*\*) :账号->媒体资源 修改 _config.yaml 文件:
1
2
google_analytics:
id: 'UA-*******'


